Weatherproofing My Garage Door for Ultimate Protection – Veterans Garage Door

As a homeowner who takes pride in maintaining the integrity and functionality of my property, one area I’ve learned not to overlook is the garage door. Often, we focus on weatherproofing our homes, but forget that the garage, too, is vulnerable to the elements. In my quest to ensure complete protection for my garage and its contents, I embarked on the journey of weatherproofing my garage door. Through research, trial, and error, I’ve discovered effective methods to seal the deal and weatherproof my garage door for ultimate protection.

I’ll share my experience and insights to help fellow homeowners safeguard their garage doors against rain, wind, and temperature fluctuations by following Garage Door Repair.

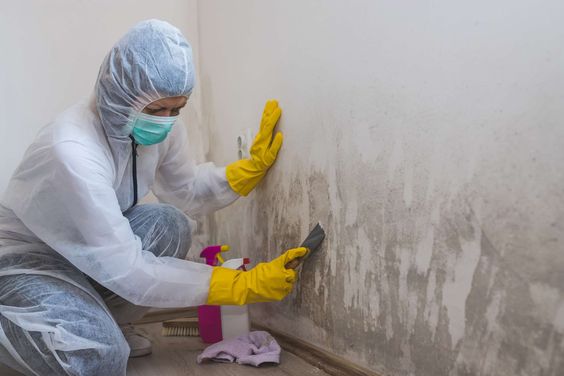
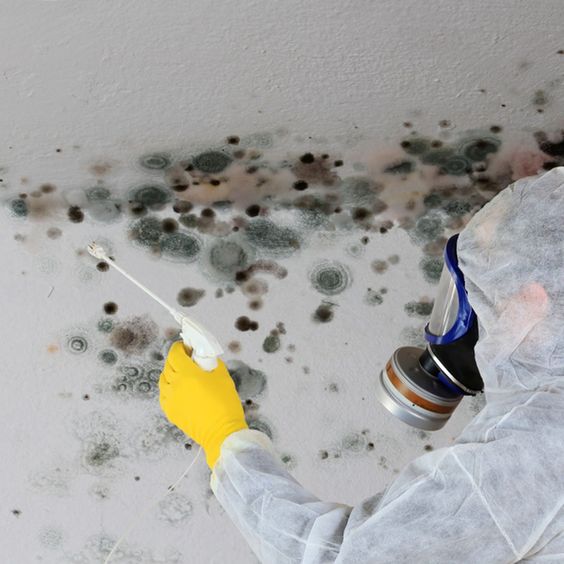
  1. Understanding the Importance of Weatherproofing: Before diving into the specifics of weatherproofing, it’s crucial to understand why it’s essential. A properly weatherproofed garage door serves as a barrier against rain, snow, wind-driven debris, and even pests. It prevents moisture from seeping into the garage, which can lead to mold, mildew, and damage to stored items. Additionally, weatherproofing helps maintain stable temperatures inside the garage, reducing energy costs and enhancing comfort.
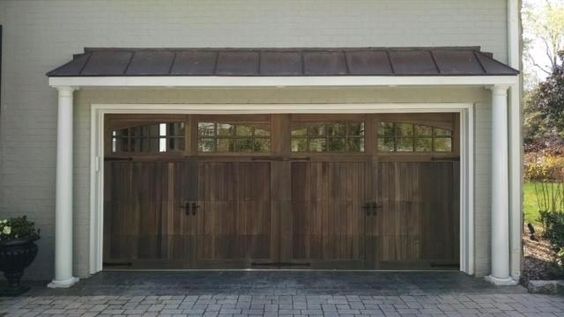
  2. Assessing Current Weatherproofing Measures: The first step in weatherproofing my garage door was to assess its current condition and existing weatherproofing measures. I inspected the door for any gaps, cracks, or damage that could compromise its ability to keep out the elements. I also checked the condition of the weather stripping and seals around the edges of the door to determine if they needed replacement or reinforcement.
  3. Choosing the Right Weatherproofing Products: Armed with knowledge about the condition of my garage door, I researched and selected the appropriate weatherproofing products for my needs. These included:
    • Weather Stripping: I opted for high-quality weather stripping made from durable materials like rubber or vinyl. Weather stripping seals the gaps between the garage door panels and the frame, preventing drafts and moisture from entering.
    • Bottom Seal: A bottom seal, also known as a threshold seal, creates a barrier against water, debris, and pests along the bottom edge of the garage door. I chose a heavy-duty bottom seal that would withstand wear and tear from daily use.
    • Insulation Kits: For added insulation and energy efficiency, I considered installing an insulation kit designed specifically for garage doors. These kits typically include foam panels or reflective insulation that can be attached to the inside of the garage door panels.
    • Sealant: In areas prone to leaks or gaps, I used sealant or caulk to fill in cracks and create a watertight seal. Silicone-based sealants are ideal for garage door weatherproofing, as they are durable and resistant to moisture.
  4. Preparation and Installation: With the weatherproofing products in hand, I began the installation process by thoroughly cleaning the garage door and its surrounding areas. I removed any dirt, debris, and old weather stripping, ensuring a clean surface for the new weatherproofing materials to adhere to. Next, I followed the manufacturer’s instructions carefully to install the weather stripping, bottom seal, insulation panels, and sealant. I made sure to measure and cut the materials to fit properly and securely fastened them in place.
  5. Testing for Effectiveness: Once the weatherproofing materials were installed, I conducted a thorough test to ensure their effectiveness. I closed the garage door and carefully inspected the edges for any gaps or leaks. I also ran water along the perimeter of the door to simulate rainfall and checked for any signs of water infiltration. Additionally, I monitored the temperature inside the garage to assess the insulation’s effectiveness at maintaining a stable indoor climate.
  6. Regular Maintenance and Upkeep: Weatherproofing is not a one-time task but rather an ongoing process that requires regular maintenance and upkeep. I developed a maintenance routine to inspect the weatherproofing materials periodically for signs of wear or damage. I replaced worn weather stripping, seals, or insulation as needed to ensure continued protection against the elements. Additionally, I kept the garage door clean and free of debris to prevent damage to the weatherproofing materials.
  7. Considering Professional Assistance: While I tackled the weatherproofing project myself, I recognize that some homeowners may prefer to enlist the help of professionals. Garage door technicians have the expertise and tools necessary to assess weatherproofing needs and install the appropriate materials correctly. If you’re unsure about the DIY approach or encounter challenges during installation, don’t hesitate to seek professional assistance to ensure the job is done right.
  8. Enjoying the Benefits of Weatherproofing: With my garage door effectively weatherproofed, I now enjoy peace of mind knowing that my garage and its contents are protected against the elements. I no longer worry about water leaks, drafts, or temperature fluctuations compromising the integrity of my garage. Additionally, the added insulation has improved energy efficiency, resulting in lower heating and cooling costs.

In conclusion, in Garage Door Repair, weatherproofing my garage door was a worthwhile investment in protecting my home and enhancing its efficiency and comfort. By assessing the current condition of the door, choosing the right weatherproofing products, and following proper installation techniques, I was able to seal the deal and ensure ultimate protection against rain, wind, and temperature fluctuations. Whether you’re a seasoned DIYer or prefer to enlist professional help, weatherproofing your garage door is a simple yet effective way to safeguard your home and belongings for years to come.

Veterans Garage Door

6497 Parkland Dr F, Sarasota, FL 34243, United States

941-699-6198

What are Some Tips for Preventing Roof Leaks? – Best Roofing Solution – Irvine

In the intricate tapestry of homeownership, the roof stands as a silent guardian, shielding us from nature’s whims. Yet, even the sturdiest fortress can face challenges, and one of the common adversaries is the ominous roof leak. As a diligent homeowner, I embarked on a mission to unravel the secrets of preventing roof leaks, understanding that proactive measures could fortify this crucial shield.

Join me on this journey as we explore some invaluable tips from Roofing Irvine CA to keep our roofs impervious to the infiltration of unwanted droplets.

*1. The Vigilant Gaze: Regular Roof Inspections as the First Line of Defense

As the custodian of my home, I recognized that a proactive approach begins with the power of observation. Regular roof inspections, akin to a watchful gaze, unveil the early signs of wear, tear, or potential vulnerabilities. Armed with a sturdy ladder and a keen eye, I ventured to inspect my roof at least twice a year – during the spring and fall. Cracked or missing shingles, deteriorating flashing, and accumulated debris in gutters were among the telltale signs that demanded swift attention.

*2. Sealing the Breach: Proper Maintenance of Roof Flashing

In the intricate ballet of roof components, flashing emerges as a crucial player, preventing water from seeping into vulnerable junctures. Recognizing its significance, I delved into the world of proper flashing maintenance. Age and weather can compromise flashing, rendering it less effective in diverting water away from joints, chimneys, or vents. Armed with roofing cement and a commitment to meticulous repairs, I ensured that flashing remained a stalwart guardian against potential leaks.

*3. Gutter Guardianship: The Role of Clean Gutters in Leak Prevention

Gutters, often relegated to the sidelines, emerged as unsung heroes in the battle against roof leaks. Clogged gutters can transform into veritable reservoirs, allowing water to seep into the roof’s foundation. Embracing a routine of gutter cleaning, especially after the fall foliage dance, became a non-negotiable ritual. Armed with gloves and a sturdy ladder, I removed debris and ensured unobstructed water flow, eliminating a potential breeding ground for leaks.

*4. The Power of Pruning: Overhanging Branches and Leak Prevention

Nature, in its exuberance, sometimes extends its reach toward our roofs through overhanging branches. While picturesque, these branches can become conduits for mischief, scraping against the roof or depositing leaves and debris. In my quest for leak prevention, I recognized the power of pruning as a strategic defense. Trimming branches away from the roof not only mitigated the risk of physical damage but also curtailed the potential for organic debris accumulation, reducing the likelihood of leaks.

*5. Shingle TLC: Repair and Replacement for Leak-Resistant Roofs

Shingles, the outermost sentinels of our roofs, bear the brunt of nature’s onslaught. Understanding that damaged or missing shingles create chinks in the armor, I embraced a proactive stance toward shingle care. Regularly replacing damaged shingles and promptly repairing any visible cracks became a cornerstone of leak prevention. My journey unfolded with the realization that a stitch in time – or a shingle, in this case – indeed saves nine.

*6. Attic Ventilation: The Invisible Ally in Leak Prevention

Ventilation, often hidden from the naked eye, emerged as a silent yet powerful ally in the fight against roof leaks. Inadequate attic ventilation can create a breeding ground for moisture, potentially leading to leaks and compromising the roof’s structural integrity. Armed with an understanding of my attic’s ventilation needs, I ensured proper airflow, preventing the accumulation of humidity and safeguarding the roof from the inside out.

*7. Weather-Resistant Sealants: Enhancing the Roof’s Defensive Arsenal

In the arsenal of leak prevention, weather-resistant sealants emerged as versatile soldiers, fortifying vulnerable areas against water intrusion. My exploration led me to identify potential weak points – be it around vents, chimneys, or skylights – where a judicious application of sealant provided an additional layer of protection. Investing in high-quality sealants designed for specific roofing materials became a strategic move to enhance the roof’s resistance to leaks.

*8. Professional Partnership: Scheduled Roof Maintenance

Acknowledging the limits of my DIY prowess, I recognized the invaluable role of professional roof maintenance. Scheduling regular inspections by seasoned roofing professionals became a proactive measure to detect potential issues before they escalated into full-blown leaks. Entrusting my roof’s care to experts not only provided peace of mind but also ensured that preventive measures were executed with precision.

Conclusion: A Shield Unyielding Against Leaks

In homeownership and based from Roofing Irvine CA, the quest to prevent roof leaks emerged as a tale of vigilance, maintenance, and strategic fortification. Armed with the knowledge gleaned from my journey, I transformed from a mere inhabitant to a guardian of my roof’s integrity. By embracing these tips, I fortified the shield above, ensuring that it remains unyielding against the unwelcome intrusion of leaks.

Best Roofing Solution – Irvine

17482 Luther Ave, Irvine, CA 92614, United States

949-990-6180

Can Mold Testing Detect Mold Behind Walls? – Mold Testing Houston- North Loop

As a homeowner deeply invested in the well-being of my living space, the specter of mold growth is a persistent concern. Mold, with its potential health hazards and structural implications, often hides in places beyond the visible eye, prompting the crucial question: Can mold testing truly detect mold lurking behind walls?

By following Mold Testing Houston TX, I’ll explore the complexities of mold detection, the limitations of various testing methods, and shed light on the effectiveness of mold testing in uncovering hidden mold issues within the walls of our homes.

Understanding the Stealthy Nature of Mold

Mold, a type of fungus, thrives in damp and humid environments, making our homes particularly susceptible to its presence. While visible mold may manifest on surfaces, such as walls or ceilings, it has a knack for infiltrating hidden spaces within the structure of our homes. Behind walls, within crawlspaces, or in concealed corners, mold can silently proliferate, posing both health risks and potential damage to the structural integrity of our living spaces.

The Challenge of Detecting Mold Behind Walls

Detecting mold behind walls poses a unique set of challenges due to the concealed nature of its growth. Mold often establishes itself in areas where moisture is present, and these hidden spaces may not be easily accessible for visual inspection. This challenge necessitates the use of specialized techniques and tools to uncover the presence of mold within the structural components of our homes.

Mold Testing Methods: Exploring the Options

Various mold testing methods exist, each with its own strengths and limitations. While some methods are effective in detecting visible mold, others are designed to uncover hidden mold in harder-to-reach areas. Here are common mold testing methods:

1. Air Sampling:

Air sampling involves collecting air samples from different areas of the home and analyzing them for the presence of mold spores. While this method is useful for assessing overall air quality, it may not pinpoint the exact location of hidden mold behind walls.

2. Surface Sampling:

Surface sampling entails collecting samples from visible surfaces suspected of harboring mold. These samples are then analyzed to identify the types of mold present. While effective for visible mold, surface sampling may not reach hidden areas behind walls.

3. Bulk Sampling:

Bulk sampling involves collecting materials or substances from suspected mold-infested areas, such as pieces of drywall or insulation. Analysis of these samples can provide insights into the extent of mold contamination within the structure.

4. Invasive Testing:

Invasive testing involves physically accessing hidden spaces behind walls to collect samples. This method requires creating openings or using specialized tools to reach concealed areas. While invasive testing can be effective, it may be impractical for routine inspections due to the potential damage caused.

5. Moisture Testing:

Measuring moisture levels within the walls is crucial for identifying conditions favorable to mold growth. Elevated moisture levels may indicate water leaks, condensation, or other issues contributing to hidden mold. Moisture testing is often a precursor to more targeted mold testing.

Can Mold Testing Detect Mold Behind Walls?

The effectiveness of mold testing in detecting mold behind walls depends on several factors, including the testing method employed, the accessibility of the hidden areas, and the extent of mold growth. Let’s delve into the nuances of various testing methods to understand their capabilities:

1. Air Sampling:

Air sampling, while providing insights into overall mold spore levels in the indoor environment, may not pinpoint the exact location of hidden mold. Mold spores can circulate through the air, and detecting elevated spore counts may indicate the presence of hidden mold but does not specify its exact location behind walls.

2. Surface Sampling:

Surface sampling is effective for detecting visible mold on surfaces but may not reach mold hiding behind walls. It can identify the types of mold present on visible areas, helping in remediation efforts, but hidden mold remains elusive to this method.

3. Bulk Sampling:

Bulk sampling can be more targeted than air or surface sampling, especially when collecting samples from materials within the walls. This method can provide insights into the extent of mold contamination within the structure. However, it requires access to the suspected areas and may not be suitable for routine testing.

4. Invasive Testing:

Invasive testing, such as opening walls or using specialized tools to access hidden spaces, is the most direct method for detecting mold behind walls. This approach can provide accurate results but is typically reserved for situations where there is strong evidence or suspicion of hidden mold growth. Invasive testing may not be practical for routine inspections due to the potential damage caused.

5. Moisture Testing:

Moisture testing is instrumental in identifying conditions conducive to mold growth behind walls. Elevated moisture levels within wall cavities may indicate water intrusion, leaks, or condensation, signaling the potential presence of hidden mold. This method is often a precursor to more targeted mold testing.

When to Suspect Mold Behind Walls

While routine mold testing may not always be necessary, certain signs and circumstances may warrant suspicion of mold behind walls. Consider the following scenarios:

1. Water Damage:

If your home has experienced water damage, whether from leaks, flooding, or plumbing issues, there is an increased risk of mold growth behind walls. Persistent moisture provides an ideal environment for mold to thrive.

2. Musty Odors:

Unexplained musty odors emanating from walls or specific areas of the home may indicate hidden mold. Mold produces volatile organic compounds (VOCs) that can contribute to unpleasant odors.

3. Visible Mold Elsewhere:

If you’ve observed visible mold growth in other parts of your home, there’s a possibility that mold may also be present behind walls. Addressing visible mold promptly and conducting further testing may be necessary.

4. Previous Mold Issues:

Homes with a history of mold problems may be prone to recurrence. If you’ve addressed mold issues in the past, remain vigilant for any signs of hidden mold behind walls.

5. Health Issues:

Persistent health issues, such as respiratory symptoms, allergies, or unexplained illnesses, may be indicative of mold-related problems. If other potential causes are ruled out, investigating the possibility of hidden mold is essential.

Professional Mold Inspections: Expert Guidance

When suspicions of mold behind walls arise, consulting with a professional mold inspector is a prudent course of action. Here’s how professional inspections can contribute to effective mold detection:

1. Comprehensive Assessments:

Professional mold inspectors conduct comprehensive assessments of homes, utilizing a combination of testing methods to evaluate indoor air quality and identify potential mold sources. Their expertise allows for a thorough examination of both visible and hidden areas.

2. In-Depth Analysis:

Professionals can analyze testing results in conjunction with visual inspections to provide a more holistic understanding of the mold situation. This includes identifying hidden mold and assessing the extent of contamination.

3. Invasive Testing when Necessary:

In situations where hidden mold is strongly suspected, professionals may recommend invasive testing methods to access concealed areas. This targeted approach provides accurate insights without causing unnecessary damage.

4. Remediation Recommendations:

Professional mold inspectors can recommend customized remediation strategies based on the specific findings of the inspection. Their expertise ensures effective solutions tailored to the unique circumstances of each home.

5. Peace of Mind:

Engaging professionals for mold inspections provides homeowners with peace of mind, knowing that the assessment is conducted by trained experts. This level of assurance is invaluable when dealing with potential mold issues, especially behind walls.

Conclusion: Navigating the Hidden Realms of Mold

In summary, based from Mold Testing Houston TX, in the intricate dance of homeownership, the question of whether mold testing can detect mold behind walls underscores the complexities of maintaining a healthy living environment. While certain testing methods offer insights into hidden mold, no single approach guarantees comprehensive detection.

As a homeowner, being attuned to signs of potential mold issues and knowing when to seek professional assistance is crucial. Routine maintenance, prompt addressing of water damage, and periodic mold inspections can collectively contribute to a proactive and vigilant stance against the stealthy threat of mold behind walls.

While we may not always see the hidden realms where mold lurks, the power to navigate and mitigate its impact lies in our ability to combine knowledge, awareness, and professional expertise. As we unravel the mystery of mold behind walls, we empower ourselves to create homes that not only stand strong but also breathe with the freshness of a mold-free environment.

Mold Testing Houston- North Loop

2950 N Loop W #500, Houston, TX 77092, United States

832-409-2125

Garage Door Safety Sensor Installation: Preventing Accidents – Ryder Garage Doors

As a devoted homeowner, ensuring the safety and security of my family and property is always at the forefront of my priorities. The garage door, a common point of entry, holds a particular significance in this regard. To fortify the protective measures around this integral part of my home, I turned my attention to garage door safety sensor installation.

I’ll share my insights into the importance of these sensors according to Garage Door Repair Vancouver WA, the process of installing them, and how they play a crucial role in preventing accidents and enhancing the overall safety of the home.

Understanding the Significance of Garage Door Safety Sensors

Garage door safety sensors are not just optional add-ons; they are a vital component designed to prevent accidents and injuries caused by a closing garage door. These sensors work in pairs, typically installed on each side of the garage door, and create an invisible beam across the door opening. The system relies on an infrared beam that, when interrupted by an object or person, triggers an immediate reversal of the garage door’s movement.

The primary purpose of safety sensors is to detect any obstructions in the path of the closing door and prevent it from coming into contact with people, pets, or objects. This advanced safety feature is a mandatory requirement for all modern garage door systems, mandated by safety regulations to protect homeowners and their families.

Step-by-Step Guide to Garage Door Safety Sensor Installation

Ensuring the correct installation of garage door safety sensors is crucial for their effective operation. Here is a step-by-step guide that I followed to install these sensors and enhance the safety of my garage:

Materials Needed:

  1. Garage door safety sensor kit (includes sensors and brackets)
  2. Screwdriver
  3. Tape measure
  4. Pencil
  5. Level
  6. Mounting screws
  7. Wire stripper
  8. Wire connectors

Step 1: Locate the Ideal Placement for Sensors

  1. Identify the manufacturer’s guidelines for sensor placement in the user manual. The recommended height is usually about 6 inches above the garage floor.
  2. Using a tape measure and pencil, mark the desired height on both sides of the garage door, ensuring that the marks are level with each other.

Step 2: Mounting the Sensors

  1. Attach the sensor brackets to the marked spots on the garage door frame using mounting screws. Ensure the brackets are level and securely fastened.
  2. Slide the safety sensors into the brackets until they click into place. Most sensors have an arrow indicating the direction of the infrared beam.

Step 3: Align the Sensors

  1. Use a level to ensure that both sensors are perfectly aligned with each other. This ensures that the infrared beam is straight and unobstructed.
  2. Make adjustments to the sensor brackets if necessary, ensuring that they are securely in place and aligned correctly.

Step 4: Wiring the Sensors

  1. Identify the wires attached to each sensor. Typically, there are two wires: one with a white stripe and one without.
  2. Use wire strippers to expose a small section of the copper wire on each of the sensor wires.
  3. Connect the sensor wires to the corresponding wires on the garage door opener unit. Match the wires with the same color-coding (e.g., white to white, black to black).
  4. Secure the connections using wire connectors to ensure a reliable and stable electrical connection.

Step 5: Concealing the Wiring

  1. If desired, use clips or adhesive cable organizers to secure and conceal the wiring along the garage door frame.
  2. Ensure that the wiring is protected from potential damage and is not in the way of any moving parts.

Step 6: Test the Sensors

  1. Activate the garage door opener to close the door.
  2. Place an obstruction, such as a cardboard box, in the path of the closing door while it’s a few inches above the ground.
  3. Observe whether the door immediately reverses its movement upon detecting the obstruction.
  4. If the door does not reverse, recheck the alignment of the sensors and the wiring connections.

Common Issues and Troubleshooting Tips

While the installation of garage door safety sensors is typically straightforward, a few common issues may arise. Here are some troubleshooting tips to address potential problems:

1. Misalignment:

Issue: If the sensors are not perfectly aligned, the infrared beam may be interrupted even when there is no obstruction, leading to door reversal.

Solution:

  • Realign the sensors to ensure they are level and facing each other directly.
  • Remove any obstructions or debris that may be blocking the infrared beam.

2. Wiring Issues:

Issue: Poor or faulty wiring connections can result in the sensors not functioning correctly.

Solution:

  • Double-check the wire connections to ensure they are secure and properly matched.
  • Replace any damaged wires or connectors.

3. Sunlight Interference:

Issue: Direct sunlight hitting the sensors can sometimes interfere with their operation.

Solution:

  • Install sun shields or shades over the sensors to protect them from direct sunlight.
  • Ensure that the sensors are positioned in a way that minimizes exposure to direct sunlight.

4. Obstructed Lenses:

Issue: Dust, dirt, or other debris on the sensor lenses can disrupt the infrared beam.

Solution:

  • Regularly clean the sensor lenses using a soft, dry cloth.
  • Remove any cobwebs or debris that may accumulate around the sensors.

The Lifesaving Impact of Garage Door Safety Sensors

The installation of garage door safety sensors transcends the realm of mere convenience; it is a lifesaving measure that prevents accidents and injuries. By acting as vigilant sentinels, these sensors offer peace of mind to homeowners, ensuring that the garage door is not a potential hazard to family members, pets, or valuable belongings.

1. Protection for Children and Pets:

Children and pets, known for their curious and unpredictable behavior, can be especially vulnerable to garage door accidents. Safety sensors act as a protective barrier, instantly halting the door’s movement if a child or pet crosses its path during operation.

2. Prevention of Property Damage:

Garage door safety sensors not only safeguard lives but also protect property. Expensive bicycles, tools, and vehicles stored in the garage are shielded from accidental damage caused by a closing garage door.

3. Enhanced Security:

The presence of safety sensors contributes to the overall security of the home. In the absence of functioning sensors, a malfunctioning garage door might go unnoticed, potentially compromising the security of the home.

Conclusion: Empowering Homeowners with Safety

Overall, according to Garage Door Repair Vancouver WA, according to Garage door safety sensor installation is not just a task to be checked off the list; it is a commitment to the well-being of those who matter most. As a homeowner, the investment of time and effort in installing and maintaining these sensors is a small price to pay for the priceless assurance they provide.

Garage door safety sensor installation is not just a task to be checked off the list; it is a commitment to the well-being of those who matter most. As a homeowner, the investment of time and effort in installing and maintaining these sensors is a small price to pay for the priceless assurance they provide.

By embracing the role of garage door safety sensors as guardians of our homes, we contribute to a safer and more secure living environment. As technology continues to advance, these sensors evolve, becoming even more sophisticated in their ability to detect and prevent potential accidents. As a vigilant homeowner, the installation of garage door safety sensors is not just a safety measure—it’s a proactive step toward safeguarding the ones we hold dear and ensuring that our homes remain sanctuaries of security and protection.

Ryder Garage Doors

PO Box 5474 Vancouver, WA 98668

360-843-7981

When Should I Consider Mold Testing? – Mold Testing Houston

In the intricate dance of homeownership, there are hidden adversaries that often lurk in the shadows, waiting to unveil themselves at the most inconvenient moments. One such stealthy foe is mold, a silent intruder that can wreak havoc on our homes and compromise our well-being. As a homeowner, the question inevitably arises: when should I consider mold testing?

In reference to Mold Testing Houston TX, I aim to share insights based on personal experiences and expert advice to help you navigate the decision-making process and determine when mold testing becomes a necessary ally in the protection of your home.

Understanding Mold: The Silent Invader

Before we embark on the journey of when to consider mold testing, let’s familiarize ourselves with the elusive foe – mold. Mold is a type of fungus that thrives in damp and humid environments, making our homes an ideal breeding ground. From the basement to the attic, mold can silently colonize various surfaces, from walls to carpets, often evading our notice until it reaches alarming proportions.

Mold’s stealthy nature is attributed to its ability to grow in hidden or less frequented areas, such as behind walls or beneath flooring. As it proliferates, mold releases spores into the air, potentially causing a range of health issues, from allergies to respiratory problems. Recognizing the signs of a potential mold issue is crucial in determining when to take the proactive step of mold testing.

Visible Signs of Mold:

  1. Discoloration: Unexplained stains or discoloration on walls, ceilings, or floors could be indicative of mold growth. Mold often presents itself in shades of green, black, or brown.
  2. Musty Odors: A persistent musty or earthy odor, especially in specific areas of your home, might signal an underlying mold problem. Mold’s characteristic smell is often the first clue before visible signs manifest.
  3. Water Damage History: If your home has a history of water damage, whether from leaks, floods, or plumbing issues, it significantly increases the likelihood of mold growth. Even seemingly minor water incidents can create conditions conducive to mold.
  4. Allergic Reactions: If occupants experience unexplained allergic reactions, such as sneezing, coughing, or skin irritation, mold could be a contributing factor. Individuals with existing respiratory conditions may be more susceptible to mold-related health issues.

When to Consider Mold Testing:

  1. After Water Damage Incidents:
    • Consider mold testing after any significant water damage incidents, such as leaks, flooding, or burst pipes. Swift action can prevent mold from taking hold and causing extensive damage.
  2. Persistent Musty Odors:
    • If you detect persistent musty odors that don’t dissipate with regular cleaning, it’s time to consider mold testing. The distinctive smell of mold is often a sign of hidden growth.
  3. Visible Mold Growth:
    • When you observe visible mold growth, whether it’s on walls, ceilings, or other surfaces, it’s a clear indication that mold has established a presence in your home. Mold testing can help determine the extent of the infestation.
  4. Unexplained Health Issues:
    • If occupants experience unexplained health issues, especially respiratory problems or allergies, and other potential causes have been ruled out, mold testing becomes a prudent step to identify and address any mold-related concerns.
  5. Real Estate Transactions:
    • When buying or selling a home, it’s advisable to consider mold testing as part of the inspection process. This proactive approach ensures that both the buyer and seller are aware of any existing mold issues.
  6. Routine Home Maintenance:
    • Incorporating mold testing into your routine home maintenance, especially in high-risk areas like basements and attics, can help catch mold issues in their early stages. Early detection allows for timely remediation, preventing extensive damage.

DIY vs. Professional Mold Testing:

Once you’ve determined the need for mold testing, the next decision involves choosing between do-it-yourself (DIY) testing kits and professional mold testing services. While DIY kits are readily available, they may not provide the accuracy and comprehensive insights offered by professional testing.

DIY Mold Testing Kits:

  • DIY kits are cost-effective and easy to use, allowing homeowners to collect samples and send them to a laboratory for analysis.
  • However, DIY kits may lack the precision of professional testing, and their results may require interpretation by experts.

Professional Mold Testing Services:

  • Certified mold inspectors possess the expertise to conduct thorough assessments, identify mold species, and provide accurate results.
  • Professional testing ensures a comprehensive examination of the property, leaving no corner unexplored.
  • The interpretive skills of professionals are invaluable in guiding homeowners through the complexities of mold testing results.

Conclusion:

In the unpredictable journey of homeownership, mold stands as a formidable adversary, demanding our attention and proactive measures. Recognizing the signs and knowing when to consider mold testing is a crucial step in safeguarding your home and the well-being of its occupants.

Whether prompted by visible signs, persistent odors, or unexplained health issues, mold testing serves as a beacon, illuminating the unseen threats within our living spaces. The decision to embark on the path of mold testing is not just about protecting your property; it’s about ensuring a safe and healthy environment for those who call it home.

As a homeowner and based from Mold Testing Houston TX, staying vigilant and informed empowers you to make decisions that will ultimately contribute to the longevity and well-being of your home. So, when in doubt, trust your instincts, listen to the subtle cues your home provides, and consider mold testing as a proactive ally in the ongoing battle against the silent invader – mold.

Mold Testing Houston

5926 Dellfern Dr, Houston, TX 77035, United States

832-409-2125

Upgrading Your Garage Door with Professional Assistance – BH Garage Door Repair & Gates

As a homeowner, I’ve always believed that the first impression matters. It’s not just about the interiors; the exterior, including the garage door, plays a crucial role in enhancing the overall curb appeal and security of your home. Recently, I decided to embark on a journey to upgrade my garage door, and I quickly realized that seeking professional assistance was the key to achieving the perfect blend of aesthetics and functionality.

By following Garage Door Repair, I’ll share my personal experience and the transformative impact that upgrading my garage door with professional help has had on my home.

The Decision to Upgrade:

Like many homeowners, my garage door was a functional necessity rather than a focal point of my home’s design. However, as I started paying more attention to the exterior of my house, I couldn’t help but notice the outdated and worn-out appearance of my garage door. This led me to contemplate the idea of an upgrade, not just for the sake of aesthetics but also for improved functionality and security.

Benefits of Upgrading Your Garage Door:

  1. Curb Appeal Enhancement: The garage door is a significant component of your home’s facade. Upgrading to a modern, stylish door can instantly elevate the curb appeal, making your home stand out in the neighborhood.
  2. Increased Home Value: A new garage door is considered one of the top home improvement projects in terms of return on investment. It adds value to your property, making it a wise investment for both current enjoyment and future resale.
  3. Energy Efficiency: Modern garage doors come with improved insulation features, helping to regulate the temperature inside the garage. This can have a positive impact on energy efficiency and, consequently, reduce heating and cooling costs.
  4. Enhanced Security Features: Older garage doors may lack the security features that come with newer models. Upgrading allows you to incorporate advanced security measures, such as smart technology, secure locking systems, and reinforced materials.

Choosing the Right Garage Door:

Before diving into the upgrade process, I spent time researching and selecting the right garage door for my home. Here are some factors I considered:

  1. Material: Garage doors come in various materials, including steel, wood, aluminum, and fiberglass. I considered the durability, maintenance requirements, and aesthetic appeal of each material before making a decision.
  2. Style: The style of the garage door should complement the architectural design of your home. Whether it’s a classic carriage-style door, a modern and sleek design, or something in between, choosing a style that aligns with your home’s aesthetics is crucial.
  3. Insulation: Living in a region with extreme temperatures, I prioritized insulation features to regulate the garage’s temperature. This consideration not only enhances energy efficiency but also provides a more comfortable space.
  4. Smart Technology: With the rise of smart homes, I opted for a garage door that could be integrated with my home automation system. This allows for remote monitoring, control, and even notifications about the status of the garage door.

The Professional Touch:

While there are many DIY tutorials available, I decided early on that entrusting the garage door upgrade to professionals was the best way to ensure a seamless and error-free installation. Here’s why:

  1. Expertise and Experience: Garage door professionals have the knowledge and expertise to navigate the complexities of installation. They understand the nuances of different garage door systems and can tailor the installation process to the specific requirements of your home.
  2. Precision Installation: Installing a garage door is not a one-size-fits-all task. Professionals take precise measurements, ensuring that the door fits perfectly and operates smoothly. This level of precision is challenging to achieve with a DIY approach.
  3. Warranty and Guarantee: Most reputable garage door professionals offer warranties on both the product and the installation. This provides peace of mind, knowing that any issues arising from the installation will be addressed promptly and at no extra cost.

My Experience with Professional Assistance:

The day of the installation was a well-coordinated process that unfolded with impressive efficiency. Here’s a breakdown of the key steps:

  1. Site Inspection: The professionals started by conducting a thorough inspection of my garage. They assessed the existing structure, the condition of the opening system, and any potential challenges that might affect the installation.
  2. Product Delivery and Inspection: The new garage door, along with all the necessary components, was delivered and inspected for any manufacturing defects. This step ensures that the installation begins with a flawless product.
  3. Removal of the Old Door: The old garage door was carefully removed, taking precautions to avoid damage to the surrounding structure. This step required attention to detail to prevent any unnecessary repairs or modifications.
  4. Installation of the New Door: The new garage door was installed with precision, ensuring that it aligned perfectly with the opening. This included attaching the panels, securing the tracks, and adjusting the tension to guarantee smooth operation.
  5. Testing and Adjustments: Once the installation was complete, the professionals conducted comprehensive tests to ensure that the door operated smoothly and without any issues. Adjustments were made as necessary to achieve optimal performance.
  6. Demonstration and Maintenance Tips: Before leaving, the professionals provided a detailed demonstration of the new garage door’s features and functionality. They also offered maintenance tips to ensure the longevity of the door and its components.

The Transformation:

The impact of the upgraded garage door was immediate and profound. Not only did it enhance the overall aesthetics of my home, but it also brought about functional improvements that I hadn’t fully anticipated. Here are some notable transformations:

  1. Curb Appeal: The modern design of the new garage door instantly transformed the exterior of my home. It became a focal point, adding a touch of sophistication and modernity that was lacking with the old door.
  2. Smooth Operation: The precision installation by professionals ensured that the garage door operated with impressive smoothness. No more creaks, jams, or struggles – just a seamless and reliable opening and closing mechanism.
  3. Smart Integration: The inclusion of smart technology allowed me to control the garage door remotely through a mobile app. This added layer of convenience proved invaluable, especially when I needed to provide access to my home while away.
  4. Improved Security: The upgraded garage door came equipped with advanced security features, including a robust locking system and sensors that detected any obstructions during closing. These features provided enhanced peace of mind.

Conclusion:

As stated in Garage Door Repair, embarking on the journey to upgrade my garage door was a decision that significantly impacted both the aesthetics and functionality of my home. The seamless and efficient process provided by professional assistance made the experience not only stress-free but also enjoyable. For homeowners contemplating a garage door upgrade, I highly recommend considering professional help. It’s an investment that pays off in terms of immediate visual appeal, increased home value, and the assurance of a job done right. My upgraded garage door has not only elevated the exterior charm of my home but has also become a testament to the value of seeking professional assistance in home improvement projects.

BH Garage Door Repair & Gates

1088 Harvest Hill Cir, Royse City, TX 75189, United States

972-947-9641

Choosing the Right AC for Your Home – Abundant Air Inc

An efficient and reliable air conditioning (AC) system keeps your home cool and comfortable. However, selecting the right AC unit for your home can take time and effort, considering the various types, sizes, and features available in the market. This comprehensive guide will walk you through choosing the right AC for your home while highlighting the importance of AC repair and maintenance.

How to Choose the Right AC For Your Home

1. Assess Your Cooling Needs

Before diving into the world of AC units, start by assessing your cooling needs. Consider factors such as the size of your home, the number of rooms, insulation quality, and climate. A professional HVAC technician can help you determine the ideal cooling capacity required for your space.

2. Types of AC Units

Different types of AC units are available, each with pros and cons. The most common styles include:

a. Window AC Units: Ideal for cooling individual rooms, window AC units are affordable and easy to install. However, they may obstruct windows and lack centralized cooling.

b. Split AC Units: Comprising an indoor and outdoor unit, split AC systems offer better cooling distribution and are suitable for multiple rooms. They are more energy-efficient than window units but require professional installation.

c. Central AC Units: Designed for cooling larger spaces, central AC units provide centralized cooling and are highly efficient. They require professional installation and ductwork.

d. Portable AC Units: Offering flexibility and mobility, portable AC units can be moved from room to room. They require minimal installation but are less efficient and may produce more noise.

3. Energy Efficiency

Energy efficiency is a crucial aspect to consider when choosing an AC unit. Look for models with a high Seasonal Energy Efficiency Ratio (SEER) rating, as they consume less energy while delivering optimal cooling performance. Energy-efficient units save you money on utility bills and contribute to a greener environment.

4. Noise Levels

Nobody wants a noisy AC unit disrupting their peace at home. Consider the noise levels produced by different models, especially if you plan to install the unit in bedrooms or living areas. Look for units that offer quiet operation without compromising cooling efficiency.

5. AC Repair and Maintenance

Regular AC repair and maintenance are essential to ensure your unit operates at its best and has a longer lifespan. Routine maintenance tasks include:

  • Cleaning or replacing air filters.
  • Inspecting and cleaning coils.
  • Checking refrigerant levels.
  • Lubricating moving parts.

Hiring a professional HVAC technician for annual maintenance is advisable to detect and address potential issues before they escalate.

6. Warranty and After-Sales Service

When purchasing an AC unit, pay attention to the warranty and after-sales service the manufacturer offers. A comprehensive warranty provides peace of mind and protects your investment. Also, choose a brand offering reliable after-sales support and readily available repair spare parts.

Conclusion

Choosing the right AC unit for your home requires careful consideration of your cooling needs, energy efficiency, noise levels, and the type of unit that suits your requirements. Regular AC repair and maintenance are crucial to keeping your unit in optimal condition and avoiding costly repairs. Following this guide and seeking professional advice, you can make an informed decision and enjoy a cool and comfortable home for years.

Abundant Air Inc.

2815 W Euless Blvd, Euless, TX, United States, Texas

817-285-8000 / 972-671-8000

How Do You Repaint Your House? – Jenco Painting

When it comes to repainting my house, I take the task very seriously.

Here are some additional details on how I personally approach the process by following steps from House Painting Stockton CA:

Step 1: Assess the condition of the current paint job Before beginning the repainting process, I assess the condition of the current paint job. This helps me determine if I need to take additional steps, such as repairing any damaged areas, before I begin painting. I also take note of any areas that require extra attention, such as high traffic areas or areas that are exposed to sunlight.

Step 2: Choose the right color and finish Choosing the right color and finish is essential to achieving the desired outcome. I take my time to select a color that complements the rest of my home and matches my personal style. For the finish, I consider factors such as the location of the area to be painted, the level of wear and tear it will experience, and my personal preference.

Step 3: Plan the project Before I begin painting, I plan out the project in detail. This includes determining the timeline, estimating the materials I will need, and deciding on the order in which I will paint each area. I also consider any potential obstacles or challenges that may arise during the project.

Step 4: Protect surrounding areas To protect the surrounding areas from paint splatters or spills, I cover any nearby furniture or flooring with drop cloths. I also use painter’s tape to cover any edges or fixtures that I don’t want to be painted.

Step 5: Apply the primer I always start with applying a primer to ensure that the new paint will adhere well to the surface and provide a smooth finish. I apply the primer in thin, even coats, allowing each coat to dry completely before applying the next.

Step 6: Apply the paint Once the primer has dried, it’s time to apply the paint. I use a high-quality paintbrush or roller to apply the paint evenly across the surface. I work in small sections, making sure to maintain a wet edge to avoid any visible brush or roller marks.

Step 7: Allow the paint to dry After applying the paint, I give it ample time to dry completely. I avoid touching or moving anything until the paint has fully cured to prevent any smudging or smearing.

Step 8: Inspect the finished product Once the paint has fully cured, I inspect the finished product to make sure it meets my expectations. I touch up any areas that need additional attention and make sure that all of the painter’s tape is removed.

In conclusion, as per House Painting Stockton CA, repainting a house is a significant project that requires careful planning, preparation, and attention to detail. By following these steps, I can ensure that the end result is a beautiful, professional-looking paint job that will last for years to come.

Jenco Painting

402 N Harrison St, Stockton, CA 95203, United States

209-931-8123

Why Do You Need to Install Concrete Flooring for Your Home? – Jenco Companies

Concrete flooring is a popular choice for many different types of buildings and spaces. This is due to a number of factors, including its durability, versatility, and low maintenance requirements.

I can provide some insights that I got from Concrete Flooring Stockton CA on why concrete flooring may be a popular choice for certain applications.

One of the main reasons why people choose concrete flooring is its durability. Concrete is an extremely tough and resilient material that can withstand a lot of wear and tear, making it ideal for high-traffic areas like commercial buildings, warehouses, and industrial facilities.

Another benefit of concrete flooring is its versatility. It can be customized in a variety of ways to suit different design preferences and functional needs. For example, it can be stained, polished, or painted to create different looks and textures. It can also be finished in a variety of ways, such as matte, glossy, or textured.

Concrete flooring is also relatively low maintenance. It requires only periodic cleaning and sealing to maintain its appearance and protect it from stains and moisture. This makes it an attractive option for those who want a flooring material that doesn’t require a lot of upkeep.

In terms of cost-effectiveness, concrete flooring is often a good choice for larger spaces or high-traffic areas. It is typically less expensive than other flooring options, such as hardwood or tile, and requires less maintenance and upkeep over time.

Concrete is also a sustainable building material that is often used in green building projects. It is durable, energy-efficient, and can be made from recycled materials, making it an environmentally-friendly choice for those who are concerned about the impact of their building materials.

Finally, concrete flooring can offer a range of health and safety benefits. It is fire-resistant and slip-resistant, making it a safe choice for commercial or industrial spaces. It also doesn’t trap allergens like carpet can, making it a good choice for those with allergies or asthma.

Overall, as stated in Concrete Flooring Stockton CA, there are many reasons why concrete flooring may be a good choice for certain applications. Whether you’re looking for durability, versatility, low maintenance, cost-effectiveness, sustainability, or health and safety benefits, concrete flooring is worth considering.

Jenco Companies

402 N Harrison St, Stockton, CA 95203, United States

209-931-8129

Are There Any Eco-Friendly Paint Options Available for House Painting in Sacramento – Jenco House Painting Sacramento

Yes, there are eco-friendly paint options available for house painting in Sacramento. These paints are designed to minimize the environmental impact of painting by using natural, non-toxic, and sustainable ingredients.

In this article, we will discuss some of the eco-friendly paint options available for house painting Sacramento.

  1. Low VOC Paints: VOCs (Volatile Organic Compounds) are chemicals that evaporate at room temperature and contribute to air pollution. Low VOC paints have fewer VOCs than traditional paints, making them better for the environment and the health of those living in the home. They are also available in a wide range of colors and finishes, making them a great option for any painting project.
  2. Natural Paints: Natural paints are made from organic ingredients such as milk protein, clay, and natural pigments. These paints are non-toxic, biodegradable, and emit no harmful fumes, making them a great option for those with allergies or sensitivities. Natural paints are also available in a wide range of colors and finishes.
  3. Recycled Paints: Recycled paints are made from leftover paints that have been collected, filtered, and mixed to create new colors. These paints are environmentally friendly because they reduce the amount of paint waste that goes into landfills. Recycled paints are available in a limited range of colors, but they are still a great option for those looking to reduce their environmental impact.
  4. Milk Paints: Milk paints are made from milk protein, lime, and natural pigments. They are non-toxic, biodegradable, and emit no harmful fumes. Milk paints have a unique texture and finish that gives them a vintage, antique look. They are also available in a wide range of colors and finishes.
  5. Clay Paints: Clay paints are made from natural clay, mineral pigments, and water. They are non-toxic, biodegradable, and emit no harmful fumes. Clay paints have a unique texture and finish that gives them a natural, earthy look. They are available in a limited range of colors, but they are still a great option for those looking for an eco-friendly paint option.
  6. Plant-based Paints: Plant-based paints are made from natural ingredients such as soy, linseed oil, and citrus. They are non-toxic, biodegradable, and emit no harmful fumes. Plant-based paints have a unique texture and finish that gives them a natural, organic look. They are also available in a wide range of colors and finishes.
  7. Water-Based Paints: Water-based paints are made from water-soluble ingredients that are non-toxic and emit no harmful fumes. They are easy to clean up with water, making them a great option for those looking for an eco-friendly and convenient paint option. Water-based paints are available in a wide range of colors and finishes.

In conclusion, there are many eco-friendly paint options available for house painting Sacramento. These paints are designed to minimize the environmental impact of painting by using natural, non-toxic, and sustainable ingredients. Low VOC paints, natural paints, recycled paints, milk paints, clay paints, plant-based paints, and water-based paints are all great options for those looking for an eco-friendly paint option.

Jenco House Painting Sacramento

1030 K St, Sacramento, CA 95814, United States

1-916-659-7822

Page 1 of 2

Powered by WordPress & Theme by Anders Norén